Mobile payments and fintech apps have made their way to every corner of the world.
For every continent, every region, every country has an app that has paved the way for different fintech solutions, and in East Africa, it’s M-PESA.
With hundreds of thousands of users, M-PESA has made it easier for people to transfer funds and manage their finances from the comfort of their smartphones.
Not only does it help the users, but it has also helped several businesses enjoy the perks of digital payments.
Thanks to the M-PESA API, also known as the Daraja API, businesses can easily enable their platform to accept payments through M-PESA.
So how does it all work? How can one integrate M-PESA in any business? Well, we will talk about all of it in this post.
If you are looking for the M-PESA API integration guide, then you have reached just the right place!
Without further ado, let’s get started!
Prerequisites for M-PESA API Integration
Before we start with the implementation, we must understand what is required to complete the process.
Integrating the Daraja API is quite a technical process and requires you to have some familiarity with the app development process to understand where and how exactly your application will be integrated.
If we talk about the prerequisites of M-PESA API integration, you primarily need the following –
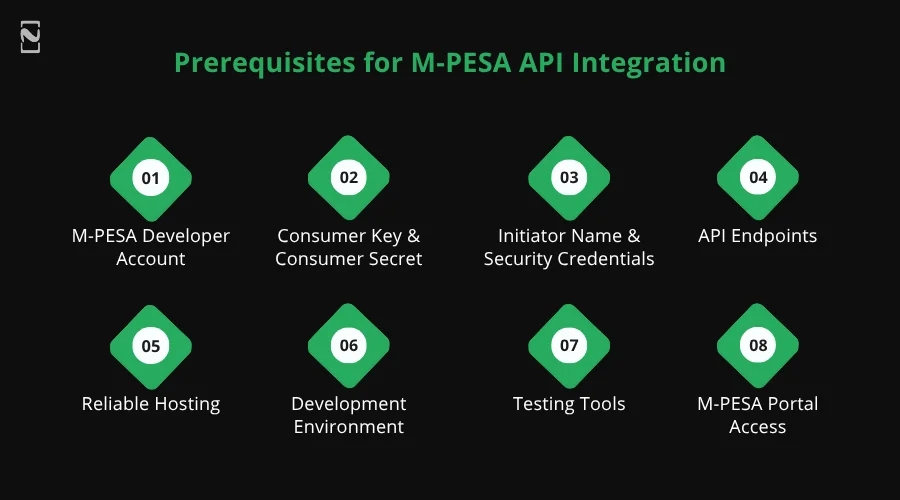
- M-PESA Developer Account: A developer account helps you gain access to the necessary tools required to initiate the integration process.
- Consumer Key & Consumer Secret: These are integral entities that are required to authenticate your API calls.
- Initiator Name & Security Credentials: These are your M-PESA API credentials, which include an API key, a Shortcode, and potentially a Passkey.
- API Endpoints: When integrating the M-PESA API, you need API endpoints to locate and navigate to the API. It is a URL that acts as the network address of the API, allowing clients to perform various necessary operations.
- Reliable Hosting: Since it is a transaction-based solution, it will eventually scale. M-PESA integration requires reliable hosting services for better scalability and security of the platform.
- Development Environment: A suitable development environment is necessary for M-PESA API integration. Choose a development environment that is flexible and can be easily scaled as required.
- Testing Tools: Before going live with the API, it is necessary to test whether it is working correctly. Tools like Postman can help you test the endpoints and the formatting of the request/response for better performance.
- M-PESA Portal Access: Make sure your M-PESA account is a business account linked to a till or paybill number, as it is the final thing that will help you track your API.
With all these, you are ready to start the integration process for M-PESA API.
Having a professional API integration specialist and a team of knowledgeable developers can significantly simplify the process.
If you plan to go through the integration process, ensure you have all the prerequisites ready.
How to Integrate M-PESA API? Step-by-Step Process
After you have acquired the necessary tools, credentials, and certifications, it is time to initiate the next step, which is integration.
The following are the steps that you need to follow for a robust Daraja API integration –
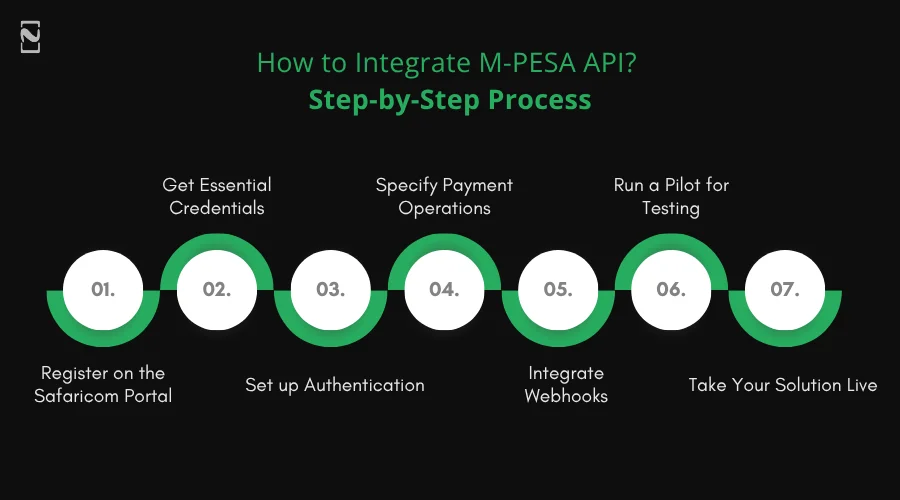
Step 1 – Register on the Safaricom Portal
Head to the Safaricom portal and register your business. This will help you list your application on the portal and get your hands on the API.
The portal serves as both your business and development guide as it offers different features and capabilities of the M-PESA API.
Keep in mind that without registering for this account, you cannot initiate the integration, even with the help of a professional.
Hence, it is advised that you register first and then approach an M-PESA API integration expert to help you out!
Step 2 – Get Essential Credentials
The next step is to obtain your credentials that will help you access and integrate the M-PESA API.
This is also the step where you get your hands on the Consumer Key and Customer Secret, which are a necessary prerequisite for Daraja MPESA API Integration.
The credentials will further allow you to easily make the API interact with your platform better.
Not to mention, the Safaricom portal requires proper communication with the payment gateway that you are using, else the API might not work as expected.
Step 3 – Set up Authentication
The next step is to set up your authentication. The M-PESA API generally uses OAuth 2.0 for better security of the application.
To set it up, you will need to share both Consumer Key and Customer Secret with Safaricom’s authentication server.
In exchange, the server generates the OAuth token, which serves as your application’s identity for the M-PESA servers.
Now, keep in mind that the authentication has its own time-out session, which means the token you have generated comes with an expiration date.
You will be required to generate them periodically, else the API requests will be rejected.
Step 4 – Specify Payment Operations
M-PESA offers multiple types of payment options and workflows. Hence, it is important to define what kind of payment workflow you want to use.
This is necessary before the integration begins, as it also defines the API endpoints and configuration that will be required for your business.
Define whether your transactions will be Customer to Business (C2B) or Business to Business (B2B).
In case it is C2B, you need to define payment processing, while for B2B, you configure the solution for timely disbursement.
Defining the payment operations firsthand makes your M-PESA API integration more efficient.
Step 5 – Integrate Webhooks
Webhooks are your instant communication between the M-PESA server and your application.
The key aspects of digital payments through a platform like M-PESA are that it makes the entire process real-time.
The customer initiates a payment transaction, and you are instantly notified of whether it went through or failed.
These notifications are enabled through Webhooks. A Webhook URL is shared with the M-PESA Servers that they can call whenever a transaction is initiated.
With the help of Webhook integration, the need for manual status checking can be eliminated, saving the essence of digital and instant payments.
Step 6 – Run a Pilot for Testing
After you have integrated your webhooks, the API is now ready to be used. It is advised that you test your integration by simply making a few test transactions.
This also allows you to understand the workflow of the API.
With the help of the sandbox provided by Safaricom, your developer can easily simulate potential payment scenarios, which helps in testing the fintech app for all types of issues, including incorrect API requests, authentication errors, or webhook delays.
Step 7 – Take Your Solution Live
After identifying the key issues, simply resolve them and take your solution live. This is the stage where your platform is out of the testing environment and enters the production environment for good.
Use the URL provided by Safaricom for production rather than using the sandbox URLs for making the final solution live.
With this stage, the integration is considered complete and live for your consumers to use.
Following these steps diligently can help you elevate your users’ payment experience, allowing you to enable M-PESA on your platform.
The integration not only simplifies the payments for your users but also brings along several different benefits. What are these benefits?
Let’s find out in the next section.
Benefits of M-PESA API Integration
One of the core reasons why businesses are keen to integrate the M-PESA API on their platforms is due to the multitude of features and advantages that it has to offer.
If you have second thoughts about M-PESA API integration, check out the following benefits, as they might help you make the decision!
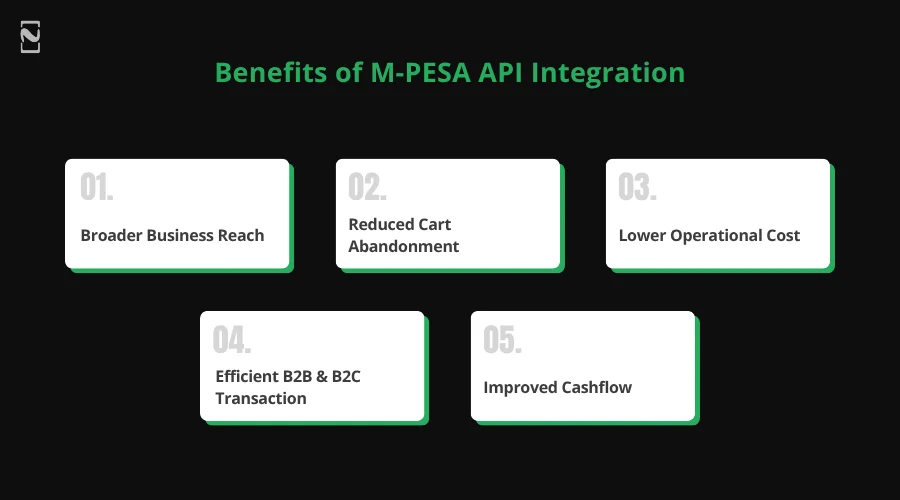
Benefit #1 – Broader Business Reach
With your platform having the ability to collect payments digitally, the business reach becomes practically limitless.
With added currency support, your platform can easily be pushed in different parts of the world, provided you meet all the requirements and compliances for those areas.
Benefit #2 – Reduced Cart Abandonment
The majority of the e-commerce platforms face the issue of cart abandonment as payment modes are not user-friendly.
When a user finds the option to pay for things instantly, they are more likely to go through the transaction.
The mind can change anytime, leading to abandonment of the items added to the cart.
Benefit #3 – Lower Operational Cost
With M-PESA digital API integration, the operational costs for handling payments become extremely low.
Everything is automated, which means the application doesn’t necessarily require a dedicated resource for tracking.
With payment history and transaction IDs, finding a transaction is easy and requires minimal effort.
Benefit #4 – Efficient B2B & B2C Transaction
Businesses that often deal in both B2B and B2C affairs can find M-PESA integration to be a game-changer.
The option works for both types of transactions and can also be automated for the same.
The efficiency is unreal as you are no longer using different methods for different transactions.
Benefit #5 – Improved Cashflow
The instant settlement of transactions offered by M-PESA improves cash availability better for any business.
The inflow of funds is better, making cash readily available for the businesses. This improved cash flow allows your business to grow faster with better liquidity.
Challenges in M-PESA API Integration
The benefits that businesses can experience with the M-PESA API integration are truly rewarding.
However, to make the most of these benefits, the integration must be completed diligently, which is a challenge in itself.
But that is not the only challenge.
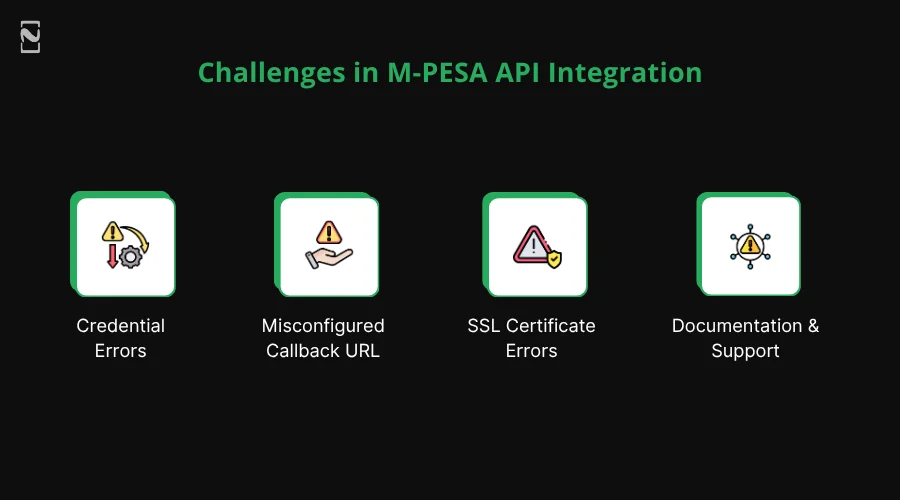
Some of the challenges that a business might encounter when integrating the M-PESA API are as follows –
Challenge #1 – Credential Errors
It is not that easy to gain access to the right M-PESA API credentials. Generating them is certainly a challenge that many novice users come across.
There’s no direct way of resolving the challenge as it requires experience and skill. Hiring a professional can definitely be more sensible if you come across this issue.
Challenge #2 – Misconfigured Callback URL
The callback URL generated by Safaricom’s portal must be configured properly to ensure the communication between the client and the server is flawless.
Also, it should be on a publicly accessible domain; if not, issues may arise.
Challenge #3 – SSL Certificate Errors
The SSL certificate is necessary for safe communication with the M-PESA API, as the transaction data is highly sensitive.
Keeping track of the SSL certificate configuration is essential; however is also a challenge many face.
Challenge #4 – Documentation & Support
Since M-PESA is a recent application, it does not have a lot of documentation and support that can be used for reference.
The challenge is real, especially for new developers and people planning to go through the M-PESA API integration process on their own.
All these challenges do make it typical for an inexperienced individual to carry out the M-PESA API integration on their own.
The best way to get over a flawless M-PESA API development is to simply hire an API integration specialist who can do it for you.
If you are wondering who can help, then keep on reading, as we might have the answer for you!

Nimble AppGenie: Your M-PESA API Integration Partner
Looking for a professional who can help you with the integration, Nimble AppGenie can be a great option.
With years of experience in fintech app development services, they can help you with the integration and also guide you through the process of setting up a robust payment system that has extended options to help you accept payments through M-PESA and several other modes.
The idea of M-PESA integration can seem daunting to someone who has no prior experience with the integration; however, when it comes to Nimble AppGenie, you can relax as you are in safe hands.
Give your platform the ability to accept modern payments with M-PESA API integration. Reach out now!
Conclusion
Digital payments are a necessity in today’s ever-evolving scenario. M-PESA API integration brings a lot of convenience to both consumers and businesses.
It only makes sense to upgrade your existing payment experience by simply integrating the Daraja M-PESA API.
However, as you already know, integrating the same is not that easy. Hence, we recommend you follow a step-by-step API integration process or let the professionals help you out.
With that said, we have reached the end of this post. Hope you find all of the shared information helpful.
In case you have any doubts or want to start the integration process with the help of experts, feel free to contact us!
Thanks for reading, Good Luck!
FAQs

Niketan Sharma, CTO, Nimble AppGenie, is a tech enthusiast with more than a decade of experience in delivering high-value solutions that allow a brand to penetrate the market easily. With a strong hold on mobile app development, he is actively working to help businesses identify the potential of digital transformation by sharing insightful statistics, guides & blogs.
Table of Contents
No Comments
Comments are closed.